
Notice
Recent Posts
Recent Comments
Link
| 일 | 월 | 화 | 수 | 목 | 금 | 토 |
|---|---|---|---|---|---|---|
| 1 | ||||||
| 2 | 3 | 4 | 5 | 6 | 7 | 8 |
| 9 | 10 | 11 | 12 | 13 | 14 | 15 |
| 16 | 17 | 18 | 19 | 20 | 21 | 22 |
| 23 | 24 | 25 | 26 | 27 | 28 | 29 |
| 30 |
Tags
- IT제어
- CapsLock키보드 뽑기
- ubunto #네티워크설정
- 코드라마 #AI
- php7
- ftp
- MSSQL #TCP/IP Enabled
- root직접로그인
- 윈도우앱지우기
- 아이티제어
- PID4
- 한글2 #hangul2_from_2024_01_17
- putty
- windows19Server
- 에디트플러스 #sftp안될때
- CenOS6.10
- centos7
- sftp
- 신바람여비서win98
- 인터넷안되는문제해결
- winscp
- PHP4
- utf8mb4
- 조성남
Archives
- Today
- Total
아이티제어
테스트용json-server간단하게 만들기 본문
1. 사전설치 : nodejs
2. json-serve설치
npm install -g json-server3. db.json 이란 파일을 생성하고 아래 추가.
{
  "posts": [
    { "id": 1, "title": "Hello World" }
  ],
  "comments": [
    { "id": 1, "body": "some comment", "postId": 1 }
  ]
}
4. json-server 실행
json-server --watch db.json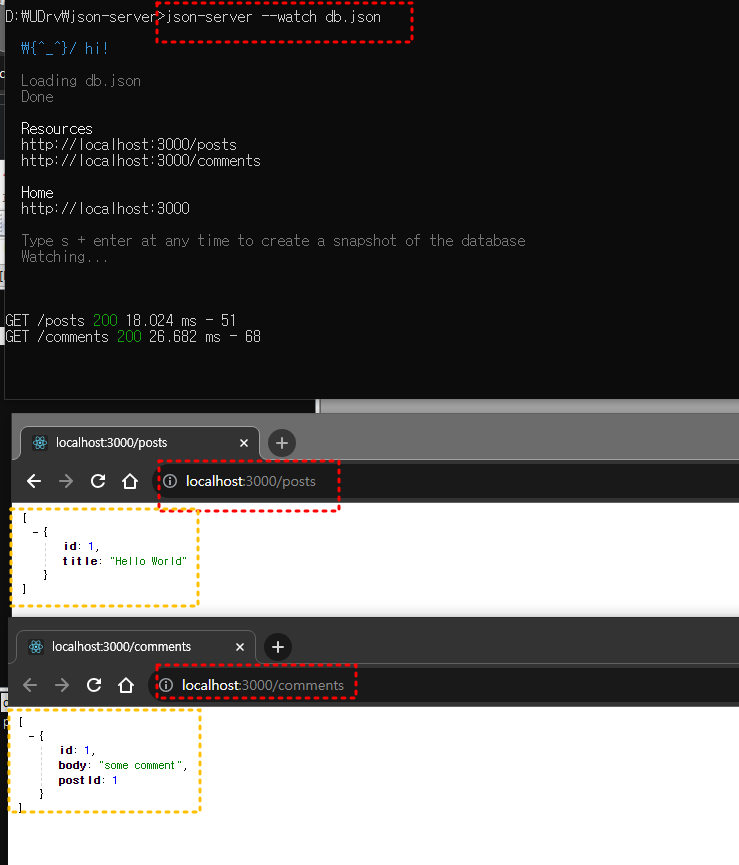
'IT인터넷/React반응' Related Articles
more


